Monday, 24 December 2012
Arrival of timber for rafters
At last the timber for the rafters arrived today. Finished moving and stacking by 4.45pm. A really great Christmas present.
Monday, 26 November 2012
The next step
All the purlins are now pegged but there are still a few pegs to make to fit to the main frame.
I have arranged for the lean to post supports to be made by Dean Forge. The posts will be galvanised and fitted in concrete - the oak post will be drilled at the base and sit on the plate and spigot - see drawing.

I have arranged for the lean to post supports to be made by Dean Forge. The posts will be galvanised and fitted in concrete - the oak post will be drilled at the base and sit on the plate and spigot - see drawing.

Thursday, 15 November 2012
Fixing Purlins
Over the past two days (allowing time for other things) I have managed to fix the purlins on one side of the roof with hexagonal pegs. These pegs can be difficult to cut to the correct size to ensure a tight fit but not too tight to damage the peg but, as with most things, practice helps.


Sunday, 11 November 2012
The last mortice and tenon
The lean to frame is now complete - having cut the last mortice and tenon yesterday. I spent some time today preparing the ground to lay some concrete to form the base for the lean to. I have pegs to cut and fit whilst waiting for the oak rafters but it seems rather strange (and slightly unreal) to have finished the frame.
There is a lot more work to do to finish the shed so I won't be looking for other things to do just yet.
 |
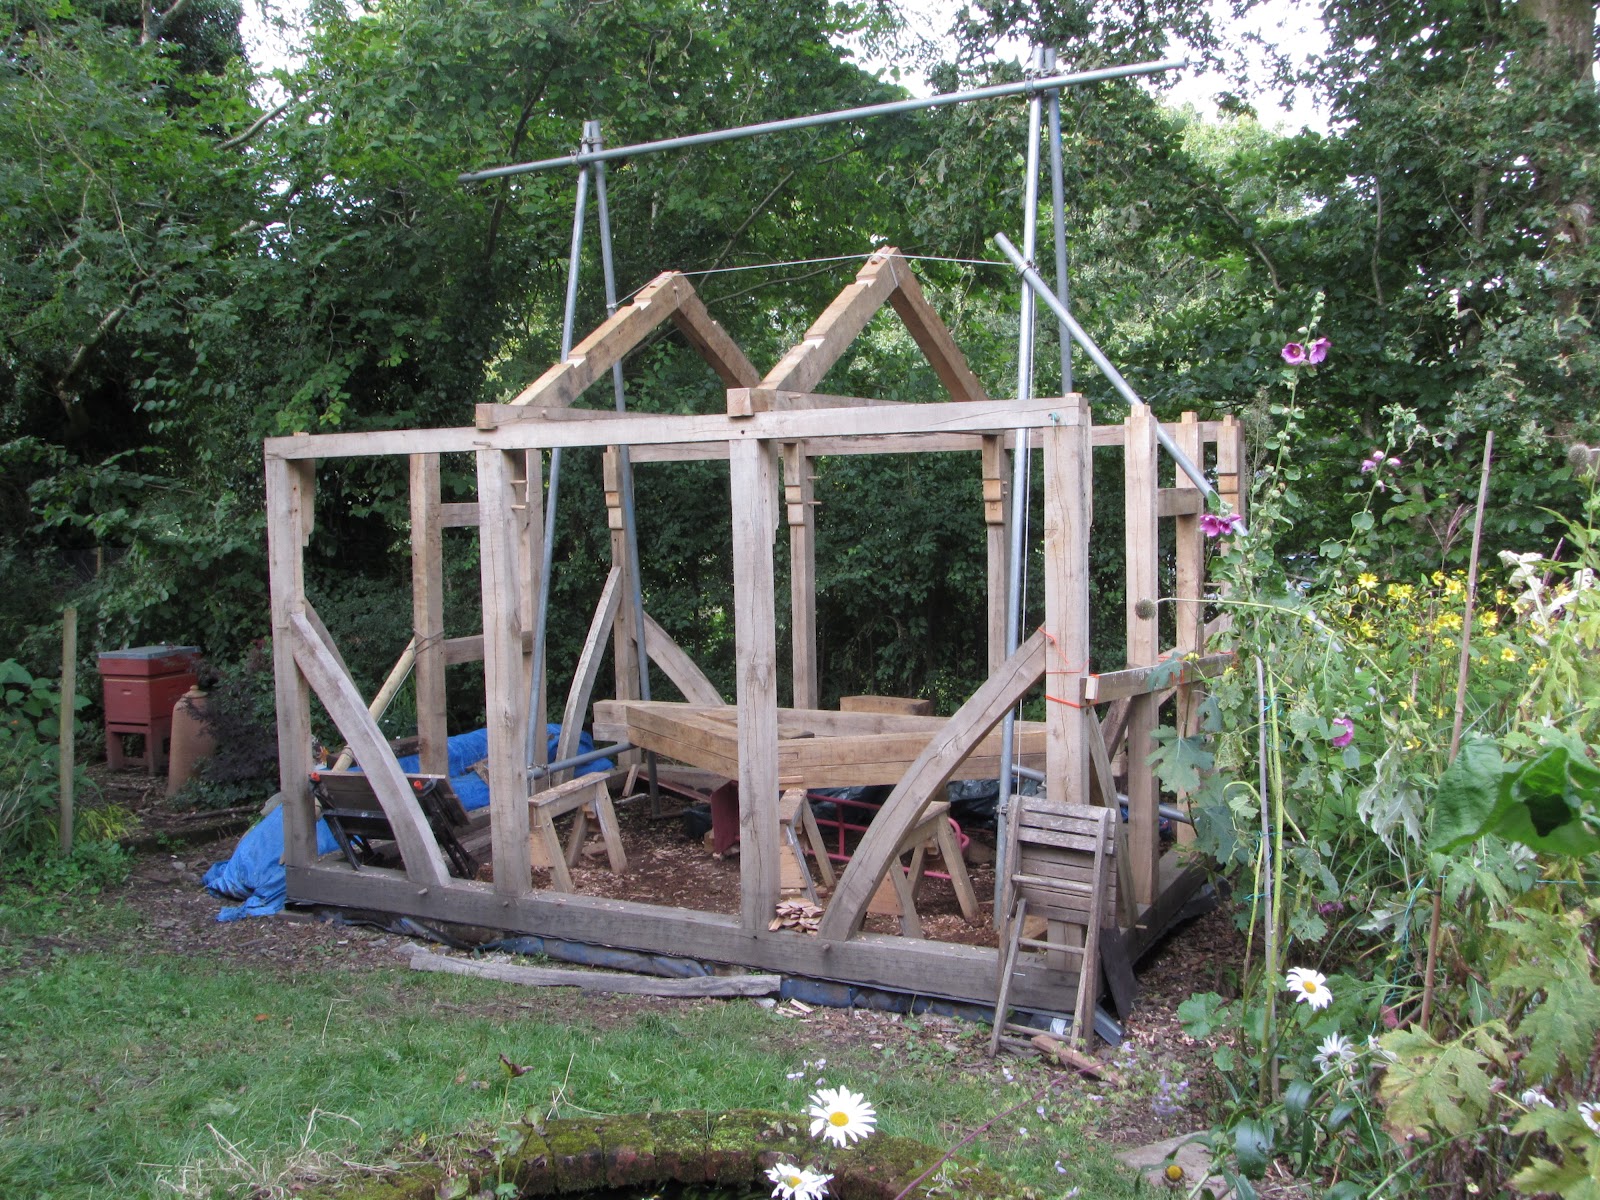
| View from the "lean to" end |
 |
| The vertical posts of the lean to are temporarily supported |
Sunday, 21 October 2012
The Last Purlin

 |
| One of the roof braces fitted between the two rear purlins |
Sunday, 7 October 2012
The First Purlin


Managed to fit the first purlin yesterday. They will need to be pegged and some additional braces for the roof may be required. If the weather stays fine this week I am hoping to have all four in place (we shall see).
Friday, 5 October 2012
Lifting and moving
 |
| The final roof frame in position |
 |
| Wall and roof frames with scaffolding positioned to hoist purlins |
Wednesday, 3 October 2012
Peg making
 |
| Rectangular blanks |
 |
| Oak log with Froe |
 |
| Cutting rectangular blanks |
 |
| Cutting square blanks |
 |
| Square blanks |
 |
| Shaping pegs from square blanks |
 |
| Shaping pegs from square blanks |
 |
| Testing the diameter of the peg |
 |
| Finished pegs |
I managed to work for a few hours on the shed this morning (before the rain started) and now there is only about 30 minutes work and the final end frame will be complete. Still for once I don't mind it raining as I have a lot of pegs to make. I have been making pegs throughout the construction of the shed - usually when the weather is not so good. However, I still need to make a lot and before I can lift the final frame I need to peg the joints to ensure it is secure.
I make the pegs using a Froe (to cut the square blanks) and a draw knife to shape the pegs from the blanks. I hold the timber in my Workmate (in a rather non-traditional way) when shaping the pegs.
Tuesday, 2 October 2012
Fitting the last end frame
 |
| Cutting the last mortice |
There is a small amount of work to finish on the final end frame so hopefully it will not be too long before this is also in place (weather permitting).
 |
| Lifting the frame into position |
 |
| Three frames now in position |
Tuesday, 25 September 2012
Fitting the second roof frame
The weather forecast was for rain this afternoon so I was expecting to work most of the day in the garage. In fact there were spells of sunshine (despite quite a lot of cloud) and only a very few spots of rain. Consequently I was able to work outside all day which has enable me to finish the second middle roof frame and fit to the tie bar.
 |
| The two centre roof frames in position |
Saturday, 22 September 2012
Fitting the first roof frame.
A week of glorious weather has enabled progress to be made and the first roof frame is now fitted.
One of the challenges with building the shed has been the weight of the timber and manoeuvring beams and frames into position. For some time I have been thinking about getting the roof frames up onto the wall plates and whether this is something I could manage on my own. The height of the scaffolding is just clear of the roof apex and because I am using two double pulleys to increase the mechanical advantage the working height is very restricted.
I calculated that if I attached the pulley to the tie beam (and fixed a loop to the top of the frame to prevent it tipping as it was lifted) I may just be able to get the frame into position.
I finished one of the central roof frames today and, as the inside frames are slightly lighter than the end frames I thought this was a good opportunity to see if I could get the frame up onto the wall plates and positioned on the tenons.
I have one end frame to finish off (two short braces to be cut and fitted) and one more central frame to make and the roof will be ready to fit the four purlins.
One of the challenges with building the shed has been the weight of the timber and manoeuvring beams and frames into position. For some time I have been thinking about getting the roof frames up onto the wall plates and whether this is something I could manage on my own. The height of the scaffolding is just clear of the roof apex and because I am using two double pulleys to increase the mechanical advantage the working height is very restricted.
I calculated that if I attached the pulley to the tie beam (and fixed a loop to the top of the frame to prevent it tipping as it was lifted) I may just be able to get the frame into position.
I finished one of the central roof frames today and, as the inside frames are slightly lighter than the end frames I thought this was a good opportunity to see if I could get the frame up onto the wall plates and positioned on the tenons.
 |
| The frame pegged and ropes attached ready to be lifted into position |
 |
| The frame lifted on to the tenons |
 |
| The first roof frame in position |
Monday, 17 September 2012
Finishing the First Roof Frame
The first roof frame is now completed this will be used as a template for the other three frames. The two central frames may not require the additional braces - which will make the construction of those a little quicker.
Quite good progress today with two more of the roof trusses cut to length and the top tenon cut. Hopefully the weather will stay dry for tomorrow.
 |
| The first A frame completed |
Wednesday, 5 September 2012
Starting the roof frames
With wet weather, a week and half holiday and then an injured back (not whilst working on the shed) Progress has been slow. However, September is now here and the weather is glorious so work has at last begun on the roof frames.
So far I have cut the tenons for the base fixing of the frames and cut two mortices on one of the tie bars. The next job was to mark the top of the timbers for length and this was slightly difficult as I was not able to lay the frame out horizontally. I worked around this with the use of pulleys clamps and wall posts. So I am now ready to cut the first two beams to length and cut the joint for the top. This will then be used as a template for the other three frames.

 |
| 8 tenons cut for the roof frames |
So far I have cut the tenons for the base fixing of the frames and cut two mortices on one of the tie bars. The next job was to mark the top of the timbers for length and this was slightly difficult as I was not able to lay the frame out horizontally. I worked around this with the use of pulleys clamps and wall posts. So I am now ready to cut the first two beams to length and cut the joint for the top. This will then be used as a template for the other three frames.
 |
| Positioning the A frame to mark the length of the frame timbers |

Saturday, 4 August 2012
A temporary roof
Rather optimistically I was hoping to start cutting the frame for the roof this week. Rain on most days has prevented this - however I have changed the orientation of the scaffolding to make it easier to lift the roof timbers.
Yesterday I decide to put a temporary "roof" on the structure hoping that it will mean I can continue to work even if the showers persist into August.
Yesterday I decide to put a temporary "roof" on the structure hoping that it will mean I can continue to work even if the showers persist into August.
 |
| Scaffolding now running parallel to front and rear frames |
 |
| Temporary "roof" |
Friday, 27 July 2012
More Tie Beams
A week of fine weather has meant that some progress has been made at last.
The tie beams were cut to shape and fitted and the last end frame assembled. The next job will be to begin work on the roof.
The middle two tie beams are cut at an angle to help tie the wall plates together. They fit into a corresponding shape on the wall plates as well locating over a tenon on each end.
Sash clamps were useful to pull the frame into position
The tie beams were cut to shape and fitted and the last end frame assembled. The next job will be to begin work on the roof.
 |
| One of two middle tie beams cut ready for fitting |
 |
| Wall plate rebated to accept tie beam |
The middle two tie beams are cut at an angle to help tie the wall plates together. They fit into a corresponding shape on the wall plates as well locating over a tenon on each end.
 |
| Fitting an end tie beam |
 |
| The wall frames complete with tie beams in position |
Wednesday, 27 June 2012
Lifting the Tie Beams
 |
| Lifting the tie beams |
This June has been one of the wettest for many years which has meant that work has alternated between the garage and the shed site often two or three times in the same day.
The four tie beams were cut to length fairly early on in June and I hoisted these into position ready to mark the mortices and rebates that need to be cut - one of these is now completed.
 |
| End wall posts in place |
Because of the uncertainty of the weather, rather than continue working on the tie beams, I started cutting the wall posts and transoms for one of the end frames. These are now finally in position. The next job (weather permitting) will be to mark and cut to shape the three remaining tie bars and begin work on the other end frame.
Friday, 1 June 2012
Finishing the front frame
 |
| Front and rear frames in position |
 |
| Wall posts and tie beams ready to begin cutting |
Friday, 25 May 2012
Sunshine and Braces
A week of glorious weather and - although I was not able to spend as much time as I would have liked working on the shed I do feel progress has been made. Both wall braces are now fitted to one corner of the front frame leaving me having to cut one more brace to shape and then the joints for the final two braces.


Monday, 21 May 2012
The Front Frame

 |
| Tie beam support |
 |
| Sole plate corner square and pegged |
The first job was to square the base and peg all four corners, as once the front braces are fitted it will be very difficult to alter the position of the sole plates.
All the wall posts were located in the sole plate and and the wall plate hoisted on to the tenons on top of the wall posts.
 |
| Locating a wall post in the sole plate |
 |
| Hoisting the wall plate |
 |
| Using pulleys to lift the wall plate into position |
 |
| Front frame in position |
Saturday, 5 May 2012
Slow progress
Progress has been frustratingly slow this week. Really bad weather at the weekend with heavy rain and very strong winds left the "site" looking very sorry for itself - the tarpaulin waving like a flag and everything wet. Still I got that sorted and moved the timber around to make it easier to work on the front frame.
 By Friday I had only managed to cut the tenons on the four wall posts for the front frame - this was mostly due to the weather and time spent making a solar wax extractor for Barbara. (This is a large box with a perspex sloping roof with two tin trays inside. The extractor uses heat from the sun to melt the wax from used hive frames so the frames can be re-used with new foundation).
The extractor is painted black to absorb the heat and the interior is covered in tin foil to reflect the heat. The top tray slopes to allow the melted wax drip through on to the lower tray which is removed through the door at the front.

 |
| Solar wax extractor |
The extractor is painted black to absorb the heat and the interior is covered in tin foil to reflect the heat. The top tray slopes to allow the melted wax drip through on to the lower tray which is removed through the door at the front.
Subscribe to:
Comments (Atom)